Raspberry Pi demo updates
24.10.2013
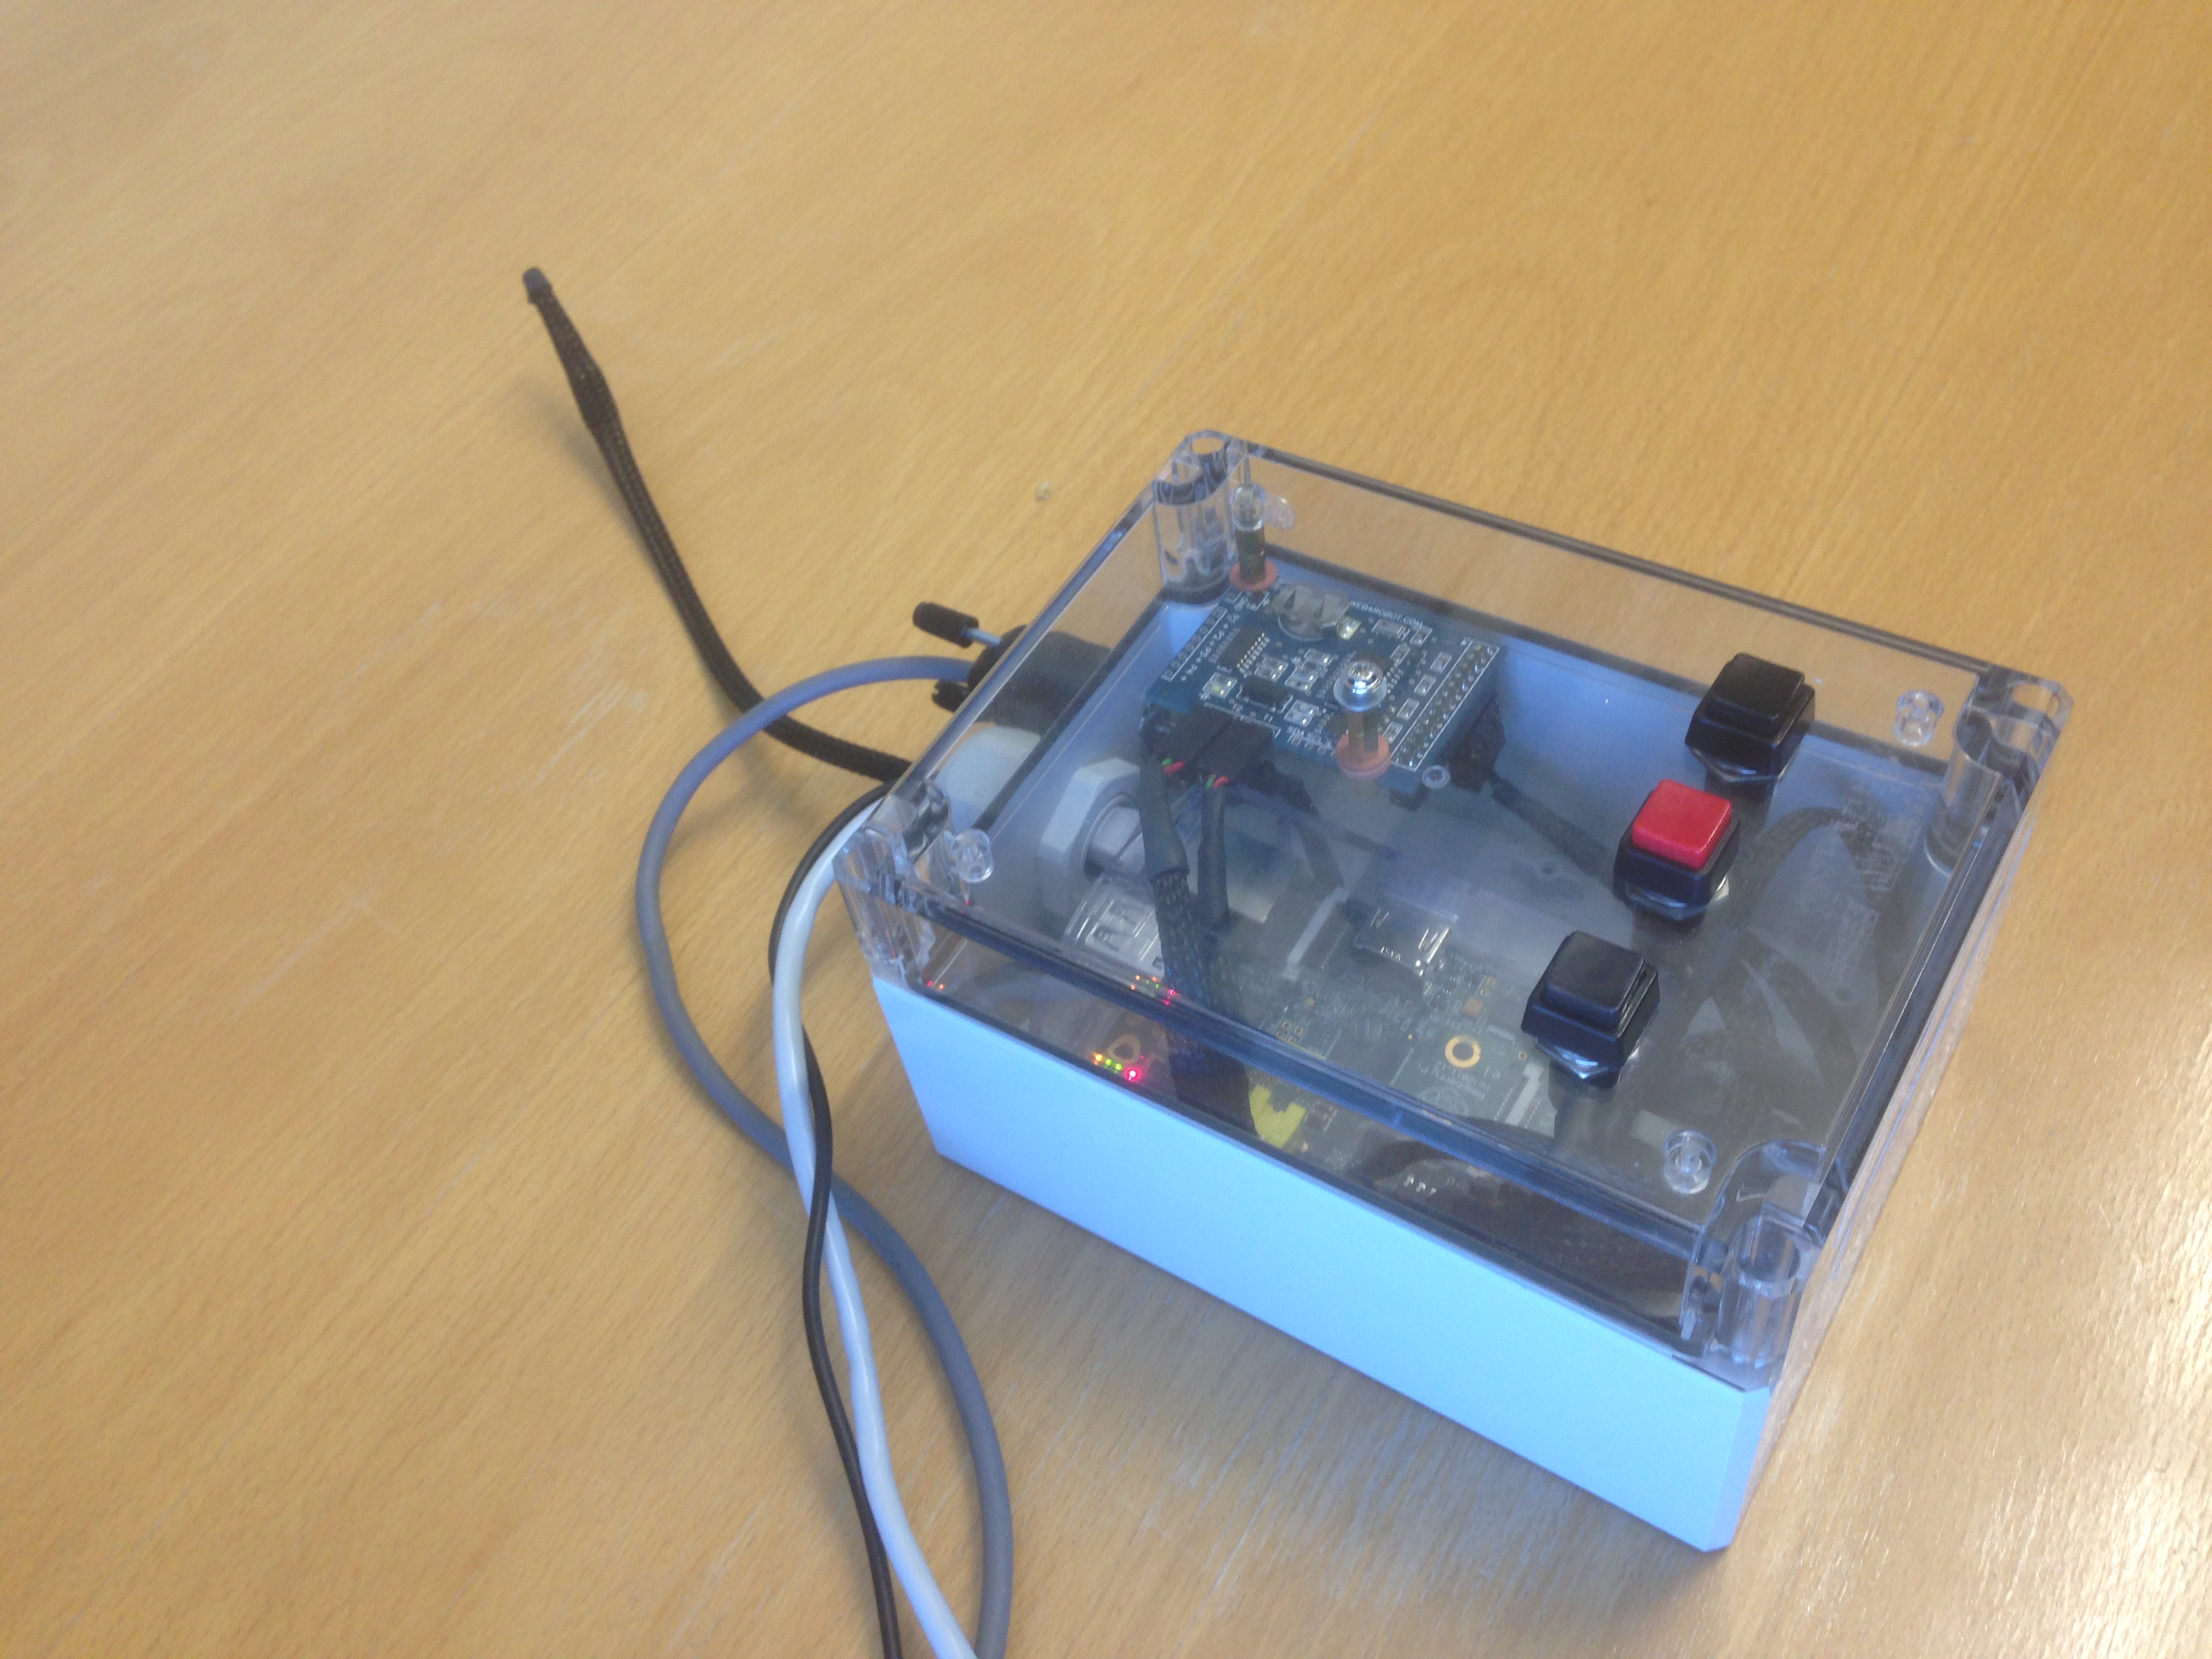
Our Raspberry Pi weather station demo has been upgraded. The system has been enclosed in a box and cables have received threaded cover layer. Two DS18B20 external temperature sensors have been added, one of them can be removed if needed (by a DB9 connector, with custom soldering). Three buttons have been added for adding interaction for exhibition visitors.
Autostarting the Server
Originally there was a start-up script that was needed to run as root after the system started. This was unpractical in demo usage; just plugging the power is much more convient. The startup script was moved to /etc/init.d/weatherstation, seen below:
#!/bin/bash

function do_start() {
#START THE WEATHER STATION OPC UA SERVER
modprobe i2c-dev
/home/prosys/java/jdk1.8.0/bin/java -jar /home/prosys/weatherstation/weather
station.jar >> /home/prosys/weatherstation/log 2>&1 &
echo $! > /var/run/weatherstation.pid
}

function do_stop() {
kill -TERM `cat /var/run/weatherstation.pid`
}

case "$1" in
start)
do_start
;;

stop)
if [ ! -f /var/run/weatherstation.pid ]; then
echo "weatherstation: not running"
exit 1
fi

do_stop
;;

restart)
if [ -f /var/run/weatherstation.pid ]; then
do_stop
fi
do_start
;;

*)
echo "Usage: /etc/init.d/weatherstation {start|stop|restart}"
exit 1
;;

esac

exit 0
We tried starting the script by using rcX.d method but but for some reason it did not work. Therefore a line
/etc/init.d/weatherstation startwas added to /etc/rc.local and that did work.
Time
The Raspberry Pi does not have a real-time clock onboard, instead it emulates it using software. If left without power for some time, the clock isn’t accurate anymore. This is problematic as secure UA connections require that the devices have their clocks synchronized (with minor offset allowed). Currently the Pi is keeping it’s clock up to date using ntp, but that’s not practical in demo usage where ntp server might not be present. As a future improvement, we will use the real-time clock that is available on the PiWeather board.
Public URI
The Server can now be accessed via the public URI: opc.tcp://212.68.9.58:48401
AddressSpace of the Server
The address space of the server has several variables corresponding to the weather measurements, 3 Booleans for the buttons and 3 temperature readings. Internal Temperature uses the PiWeather board’s internal sensor. External Temperature uses sensor placed outside the box. The internal temperature is of course a couple of degrees higher than outside of the box, due heating from the proccessor. Outside Temperature variable will display outside temperature as soon as we figure out how to put the sensor outside. There is also a Humidity and Pressure variables, displaying the data from PiWeather board’s internal sensors. All variables provide history data.


Bjarne Boström
Software Engineer
Email: bjarne.bostrom@prosysopc.com
Expertise and responsibility areas: OPC UA product development and project work
Tags: Demo, Embedded, Java, OPC UA, Raspberry Pi
comments powered by DisqusAbout Prosys OPC Ltd
Prosys OPC is a leading provider of professional OPC software and services with over 20 years of experience in the field. OPC and OPC UA (Unified Architecture) are communications standards used especially by industrial and high-tech companies.
Newest blog posts
Why Do Standards Matter in Smart Manufacturing?
The blog post discusses the importance of standards in smart manufacturing, envisioning a future where auto-configurable systems in manufacturing rely on standardized data formats for seamless integration and reduced costs, with a focus on the OPC UA standard family as a key enabler.
OPC UA PubSub to Cloud via MQTT
Detailed overview of the demo presented at the OPC Foundation booth
SimServer How To #3: Simulate data changes on a server using an OPC UA client
A two-part step-by-step tutorial on how to write data changes on an OPC UA server using an OPC UA client.